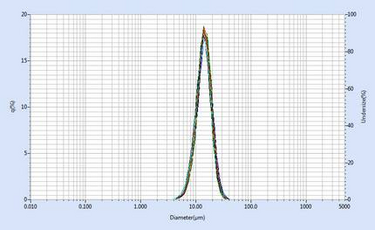

A study on LA-960 gauge-to-gauge variation was performed with 40 unique, randomly selected units of the LA-960 Particle Size Analyzer: 20 for wet measurements and 20 for dry.
Two NIST-traceable, polydisperse (range of sizes) glass bead materials were used in this study. The challenge samples were PS-202 (3-30 µm) and PS-215 (10-100 µm) from Whitehouse Scientific. PS-202 was measured in an aqueous wet dispersion according to the method outlined in Analytical Test Method 112. PS-215 was measured in a dry dispersion using the PowderJet accessory according to the method outlined in Analytical Test Method 113. The raw scattering data was transformed into a particle size distribution via the Mie scattering theory.
ISO 13320:2009 section 6.4 states that for the median size of the distribution the coefficient of variation should be less than 3%. Values at side of the distribution such as D10, D90, should have a coefficient of variation not exceeding 5%. PS-202 (3-30 µm) and PS-215 (10-100 µm) were tested with 20 units each. The coefficient of variance is 4.03%, 2.40% and 2.79% at D10, D50 and D90 for PS202, and 2.35%, 2.95% and 4.60% for PS215. All the results meet ISO 13320:2009 specification.
This study aimed to mimic real-world conditions for many customers who must reconcile results from multiple operators, units, and locations. This is particularly important for those users with units across the world where the challenge of supporting across multiple time zones and languages grows quickly. In this context the LA-960 Particle Size Analyzer proves an excellent solution with superb data correlation for realistic (polydisperse) samples across:
This is accomplished without any unit-matching technique and at normal performance (i.e. no low sensitivity data processing). Such performance is unmatched on the market today.
The word precision is often used as a catch-all to describe the results from any kind of repeated test. Understanding the different types of precision is important because some tests are more difficult (and meaningful) than others.
The table below helpfully summarizes how these three tests differ. This information appears courtesy of ASTM and can be found in ASTM E177, Practice for Use of the Terms Precision and Bias in ASTM Test Methods, and E456, Terminology Relating to Quality and Statistics.
Repeatability Condition | Intermediate Precision Condition | Reproducibility Condition | |
Laboratory | Same | Same | Different |
Operator | Same | Different | Different |
Apparatus | Same | Same * | Different |
Time between Tests | Short ** | Multiple Days | Not Specified |
* This situation can be different instruments meeting the same design requirement.
** Standard test method dependent, typically does not exceed one day.
Laser Scattering Particle Size Distribution Analyzer
Laser Scattering Particle Size Distribution Analyzer
Do you have any questions or requests? Use this form to contact our specialists.