
Virtually any metal can be made into a powder through processes including atomization, electrolysis, chemical reduction, and size comminution. The metal powder can then be used to fabricate parts from simple to complex shape. The technique and study of these processes is known as powder metallurgy, a field of study well acquainted with particle characterization. The size distribution and shape of the powder metal particles influences the physical properties of the parts created.

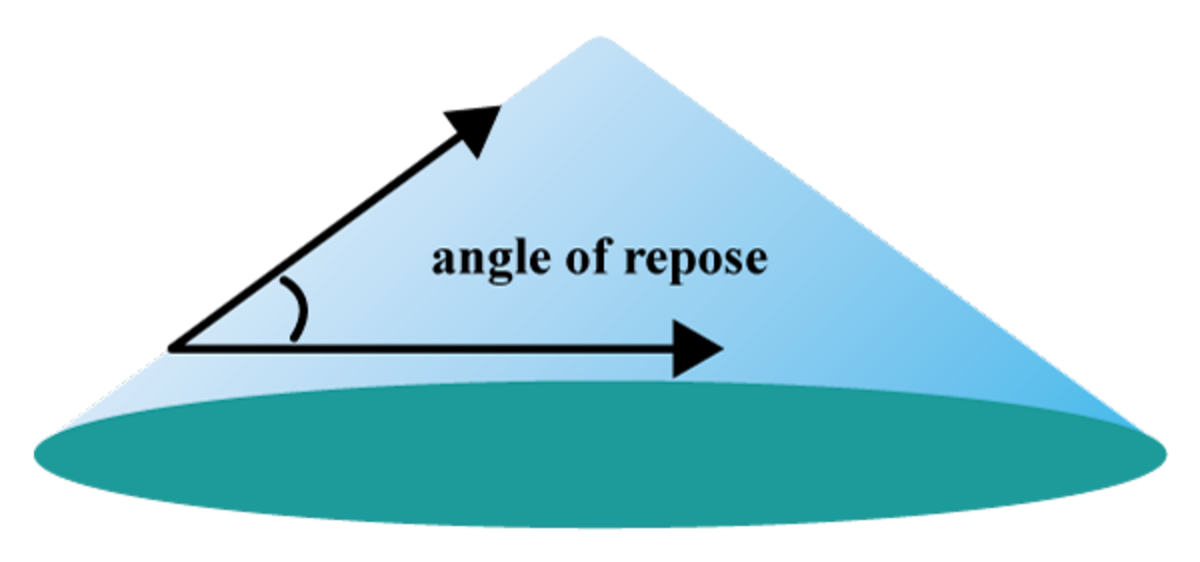
Physical properties important to metal powder processing and performance include particle size distribution, shape and inter-particle friction. Powder flow and compaction are highly dependent on the friction between the particles. The most common way to quantify inter-particle friction is by measuring the angle of repose: the angle formed by pouring the powder through a funnel onto a flat surface. Higher angles indicate greater friction while smaller angles suggest less friction.
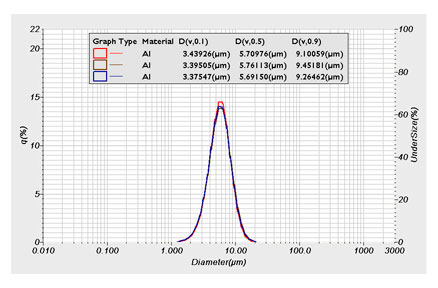
Particle size analysis of metal powders has been performed using various techniques through the years including microscope, sieves, aerodynamic time of flight, and laser diffraction. The most popular technique for measuring the size distribution of metal powders is now laser diffraction, typically measured in its natural state as a dry powder. The LA-960V2 PowderJet dry powder accessory is an ideal analytical tool for measuring metal powders.

Three consecutive measurements of aluminum powder using the LA-960 and PowderJet dry powder feeder.
Since laser diffraction is such a popular method to measure the size of metal powders an ASTM standard was written to guide proper technique. ASTM B822 - 02 Standard Test Method for Particle Size Distribution of Metal Powders and Related Compounds by Light Scattering provides guidance on the use of laser diffraction for measuring metal powders. The ASTM standard notes the requirement for a representative sample – suggesting a micro-sample splitter to minimize sampling errors. When measuring the powder in a liquid suspension the standard points out that it is important to create a stable dispersion.
The Metal Powders Industry Federation (MPIF) published the International Journal of Powder Metallurgy and provides a forum for interested scientists to learn about powder metallurgy through short courses and technical meetings.
Laser Scattering Particle Size Distribution Analyzer
Dynamic Image Analysis
Direct Imaging Particle Analyzer
Nanoparticle Analyzer
Centrifugal Nanoparticle Analyzer
Laser Scattering Particle Size Distribution Analyzer
Laser Scattering Particle Size Distribution Analyzer
BET Flowing Gas Surface Area Analyzers
BET Surface Area Analyzers
Simultaneous Multi-Laser Nanoparticle Tracking Analysis (NTA)
Do you have any questions or requests? Use this form to contact our specialists.
